Advanced Initial Access Techniques
In this blog post, I will teach you the methodology and techniques adversaries use to compromise systems. I will showcase the payload development process and its delivery—both remote and physical.
RED TEAM PATH
Lorenzo Meacci @kapla
2/23/202510 min read


Introduction to Initial Access
Initial access is arguably the most delicate part of a red team assessment. There are multiple approaches to gaining initial access. The first involves searching for leaked credentials or access keys belonging to the target’s employees. However, this is a probabilistic approach, and the client may not have remote access services exposed to the external perimeter.
Another method is targeting users with a phishing campaign, tricking them into executing malware that provides remote access (RAT). Finally, during physical assessments, we might gain access to an unlocked machine, where we can use a Rubber Ducky to execute the malware.
Initial Access methodology
Infection chains can be complex, REALLY COMPLEX, and is our job to manage and architect them. Here is an example below:


Not long ago, sending an Office document with embedded macros was sufficient to gain initial access. However, this is no longer the case, as AV/EDR solutions have significantly improved, and Microsoft has implemented security mechanisms to prevent some macro-based attacks.
The infection chain taxonomy, well-defined by Mariusz Banach, follows this structure:
DELIVERY(CONTAINER(PAYLOAD + TRIGGER + DECOY))
DELIVERY: The method used to deliver the container to the user.
CONTAINER: A package that combines multiple files into a single file.
PAYLOAD: The actual malware.
TRIGGER: The element the user is tricked into interacting with to initiate the infection chain.
DECOY: The content presented to the user to make the attack appear legitimate.
During the development chain, we start from the core of the taxonomy (PAYLOAD, DECOY, TRIGGER):
Infection chain
Trigger
The trigger can be a shell link, a shell link is a data object that contains information used to access another object in the Shell's namespace, shell links have a .lnk file extension which is not visible in explorer, making them a very subtle file format. We can use them as triggers by modifying the “Target field”.
To create a shell Link, we can use powershell, as follows:
In this case, malware.exe will be the payload, and RealPDF.pdf will be the decoy. This way, when someone clicks on the trigger, both the malware and the decoy will get executed.
Now, of course, we need to add malware.exe and the decoy in the Shell Link directory. malware.exe will be the Havoc agent, and the decoy can be any random PDF. Of course, a salary-related PDF will be less suspicious to the victim. To search for the PDF, we can use the filetype Google dork:


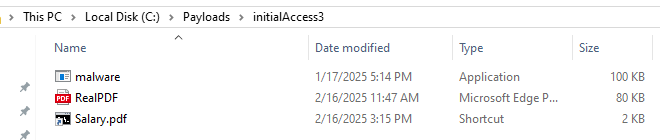
Now we can download the one we fancy the most (or create one of our own to match the client's company features), and add it to the shell link directory as RealPDF.pdf, next add the Havoc agent payload in the same directory:
Now, in File Explorer, we can see that the three files are all visible... We don't want that because even a chimp would be able to tell that this is not safe to run.

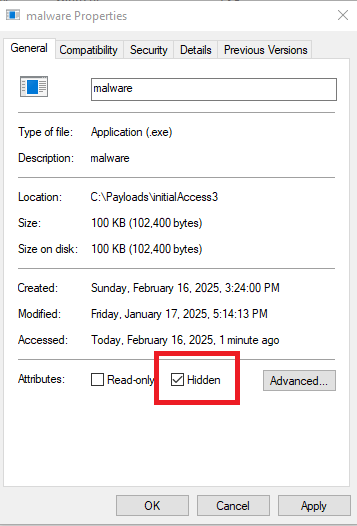
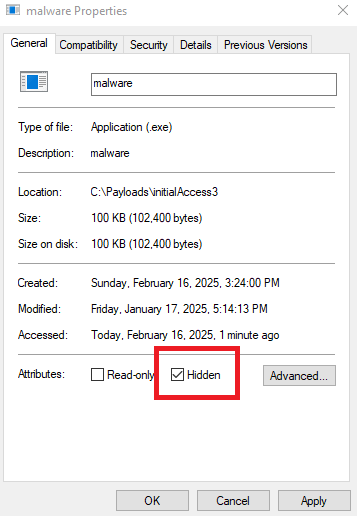
We need to hide both the malware and the decoy and make the trigger more appealing to click. To hide files, we can just right-click on them and select Properties -> 'Hidden' -> Apply
Now only the trigger is visible:


Now, the only thing left to do is change the icon to something more legit, like a PDF icon. To do so, click Properties -> 'Change Icon'
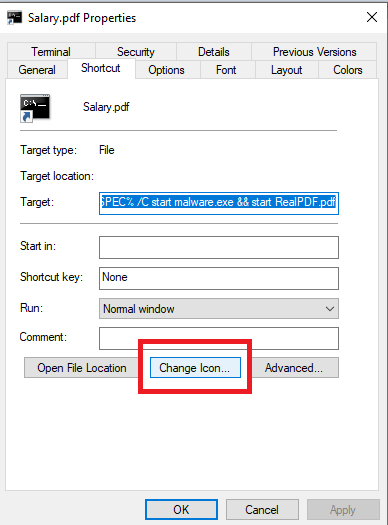
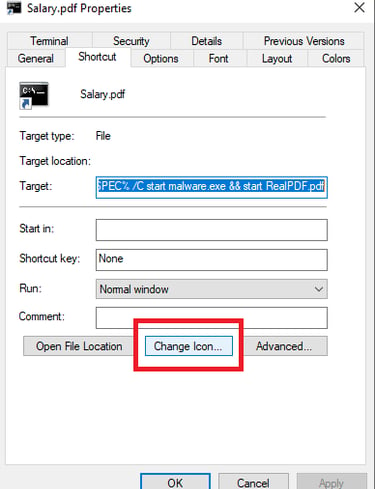
and modify the icon file path to : %ProgramFiles(x86)%\Microsoft\Edge\Application\msedge.exe
Now select the pdf icon and -> OK -> Apply:
If everything was done correctly, after clicking the Salary.pdf file we should get a session back:

The Payload
Using a raw Havoc agent won't help you in the real world. This is because AV and EDR solutions are kept up to date to detect known malware signatures, behavior detection, etc. That's why knowing how to develop and test your own payload is crucial.
I will show you how to create a malicious DLL that loads the Havoc agent in memory using the Native API. This technique is well known as DLL sideloading. It can works by exploiting how Windows searches for DLLs in the system:
The directory of the executable
C:\Windows\System32 (System directory)
C:\Windows\System (16-bit system directory, rarely used)
C:\Windows (Windows directory)
Current working directory (CWD)
Directories in the system PATH environment variable
Directories in the user PATH environment variable
If an application tries to load a DLL and that DLL is not found in the binary directory, it will attempt to find it in C:\Windows\System32, then in C:\Windows\System, and so on. We can hunt for binaries in Windows that attempt to load a missing DLL. We can exploit this by placing a malicious DLL in the working directory and waiting for the application to start. Once the application runs, the DLL should be loaded and executed.
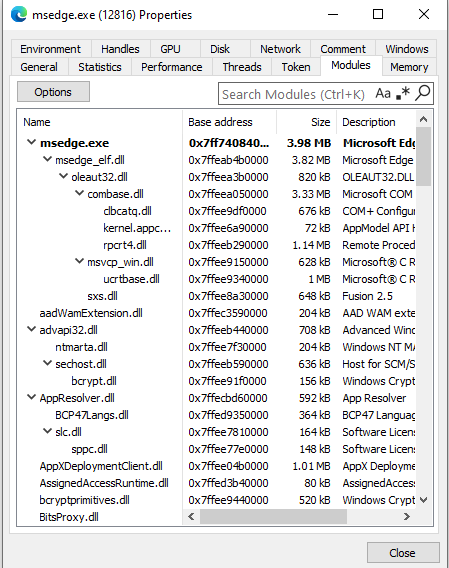
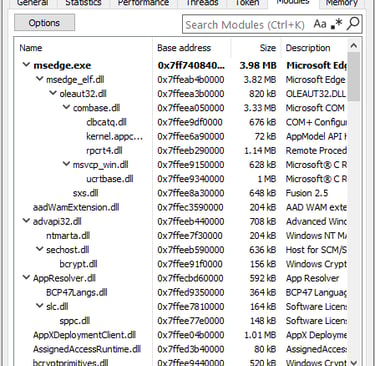
To analyze this, we can open Process Hacker, navigate to Modules, and view all the loaded DLLs along with their corresponding base addresses:
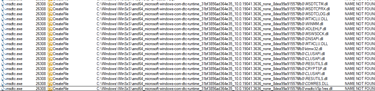
One way to find vulnerable system executables is by using Process Monitor (Procmon) and searching for applications that attempt to load a DLL but return the result 'NAME NOT FOUND'.
Apply the following filter:
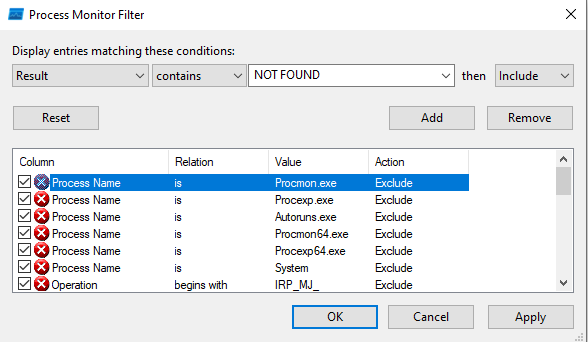
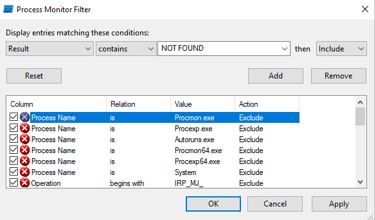
then include the “CreateFile” operation:
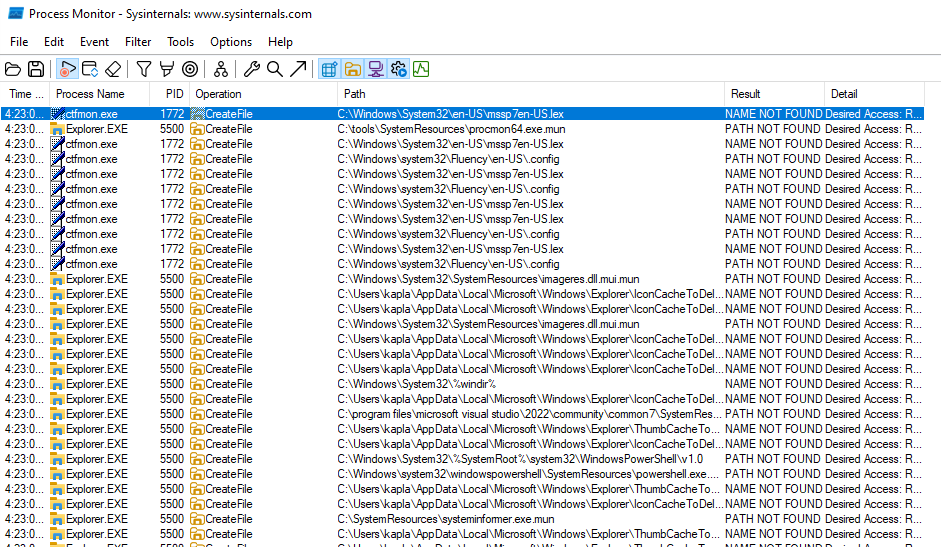
And execute a Windows binary, hoping for some 'NAME NOT FOUND' DLLs. This is a list of known vulnerable binaries:
For this demo, I targeted msdtc.exe.
Additionally we can find older versions of the software using this PowerShell command:
Just keep monitoring and from a PowerShell windows start the program, and you should see the app is searching for different DLL's in that directory and none is found:
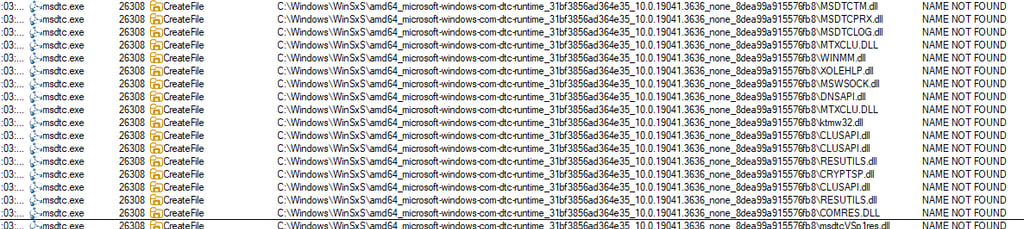
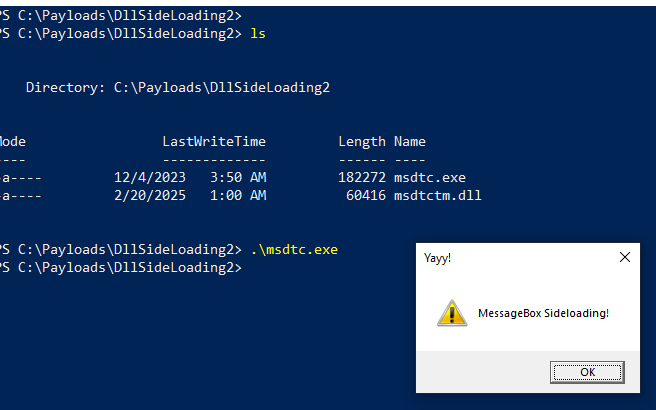
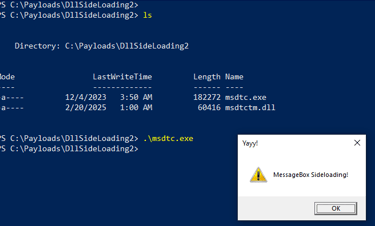
This means that by putting a dll named, winmm.dll in the same directory it should get loaded and executed by the application:
Now, running msdtc.exe should load the DLL and execute the message box. This happens because DllMain serves as the entry point of the DLL when it is invoked by the system during the process of loading and unloading the DLL.
Normally, in application development, it is not recommended to have many instructions in DllMain, as this could cause deadlocks or unexpected application behavior. To avoid this, we need to find the DLL exports and implement those in our code. DLL imports are used after the DLL is already loaded.
Now, we can open C:\Windows\WinSxS\amd64_microsoft-windows-com-dtc-runtime_31bf3856ad364e35_10.0.19041.3636_none_8dea99a915576fb8\msdtc.exe in x64gdb and analyze the Symbols tab. It contains the loaded modules and the corresponding export table
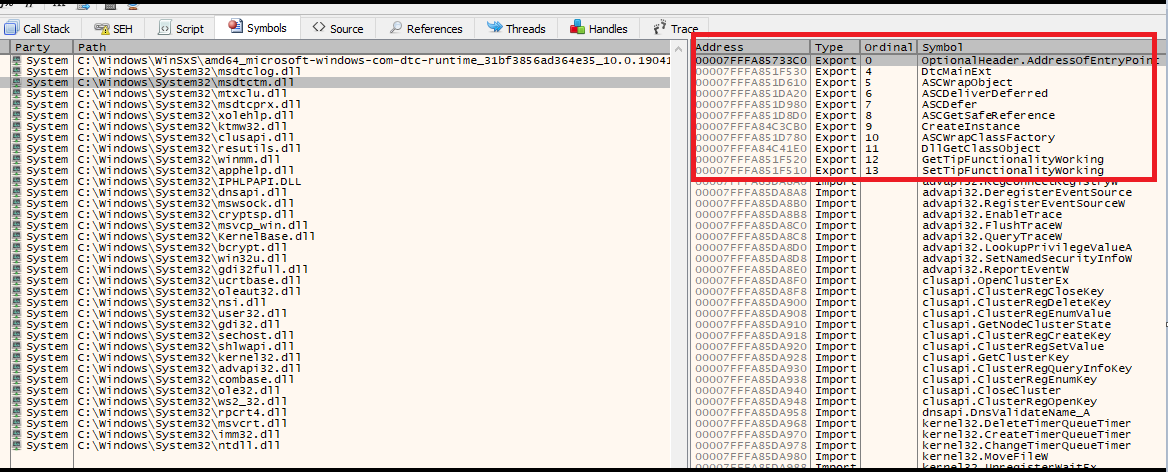
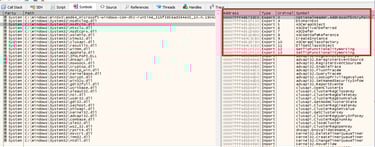
we can also add break points to the Export table and run the application again:
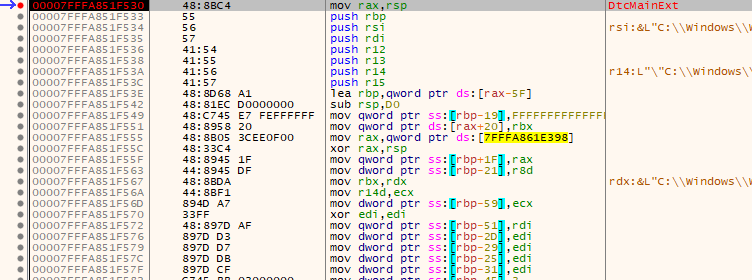
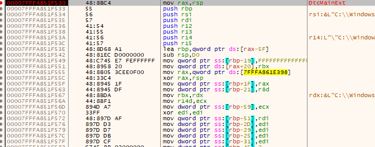
We see that DtcMainExt gets called from the msdtctm.dll. Since the function is being called by ordinal and not by name, we need to modify the project in Visual Studio. You can imagine ordinals as the numerical identifier of functions inside a DLL.
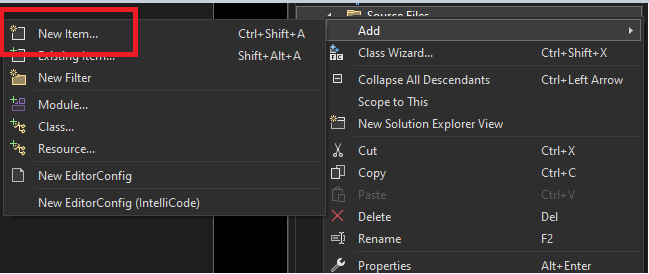
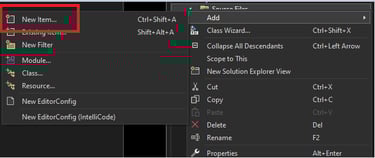
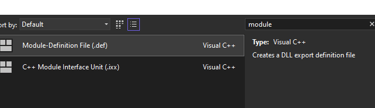
Add the module definition file:
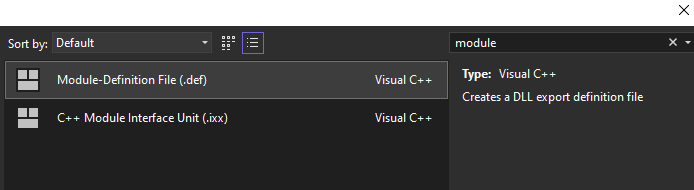
Now go in the .def file and under “library” add:
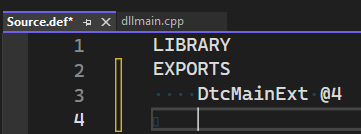
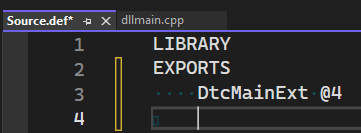
To test if this works, we can create an export function inside the DLL and call it DtcMainExt. We can then compile the DLL and either copy the DLL named msdtctm.dll into the msdtc.exe native directory OR copy the binary into the DLL directory and run it.
Test code:
At this point, we need to create a malicious function inside the DLL that dynamically fetches the shellcode via HTTP/S and loads it into memory.
A deep dive into shellcode loaders is beyond the scope of this blog, but here’s a high-level overview of how it works:
We implement a download function in the code that retrieves the shellcode and stores it in a variable.
We allocate RWX (Read-Write-Execute) memory or execute the shellcode directly from the heap.
We copy the shellcode into the allocated memory region.
Finally, we create a new thread to execute it.
I encourage you to experiment with the code a bit and see if it gets detected by Defender. A tip would be to use NtCreateSection + NtMapViewOfSection to have a backed memory region instead of an unbacked one, and maybe allocate memory as RW first and switch to RWX later at runtime.
Packing & Delivery
Now that we have created a functioning payload, we can pack and deliver it. I want to showcase another possible trigger this time, Batch files. So we will concatenate the Shell link and point it to the bash file this time.
Create the payload again, this time using a batch file.
Batch files are used for scripting purposes in Windows, with commands interpreted sequentially by an interpreter such as cmd.exe. To prevent commands from being displayed to the user, we can prepend @echo off at the beginning of the batch file. If commands produce any output, we can suppress it by adding > nul 2>&1 at the end of the command.
The file that needs to be copied into the current directory is:
C:\Windows\WinSxS\amd64_microsoft-windows-com-dtc-runtime_31bf3856ad364e35_10.0.19041.3636_none_8dea99a915576fb8\msdtc.exe
After that, we can simply execute it, and the DLL should be loaded and executed.
The batch file will look something like this:
What this script does is execute msdtc.exe in the current directory so that it loads the malicious DLL, and lastly, opens the decoy PDF that will be shown to the user.
Now, we will create a shortcut to the batch file. This way, we can assign it the PDF icon like we did before, making it appear more legitimate.
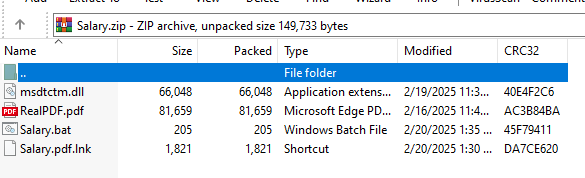
The files that will be sent to the victim are:
Now we can pack the payload and send it to the victim
DEMO:

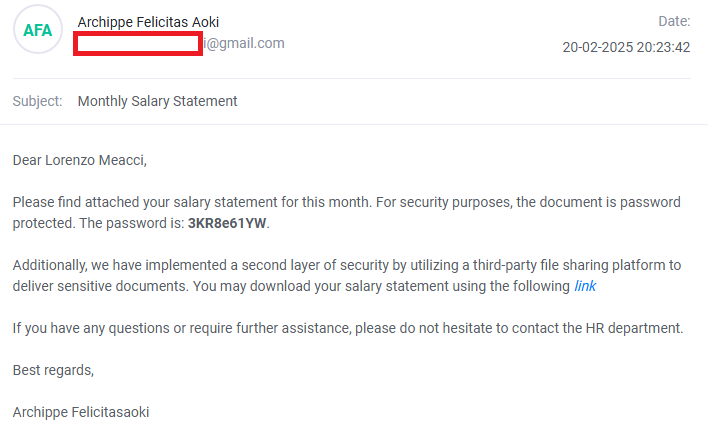
Now, we can zip the file and remember to password-protect the archive. This prevents browser scanners from detecting malicious files.
Normally, you would set up your own domain with MX records, but this takes time. A quicker solution is Gmail. However, Gmail does not allow the upload of password-protected archives containing potentially unwanted data. To bypass this, we can use a third-party file-sharing platform.
But first, we need to pack our payload. Packing is used to combine multiple files into a single one—examples include ZIP archives. Various file extensions can be used for this purpose, but I find .img files to be the best because they don’t require external software for extraction and can effectively hide files. In contrast, opening a ZIP file with WinRAR will reveal hidden files
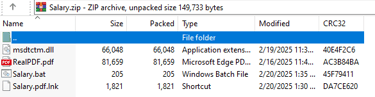
We could combo the two techniques together, and zip an img file, to pack the files I used this tool “PackMyPayload”:
We can pack multiple files in an .img file with the following command:
Now we can view the .img file in explorer and double-clicking on it, we only see the trigger:


We can now use our favorite archiver to zip the file with a password.
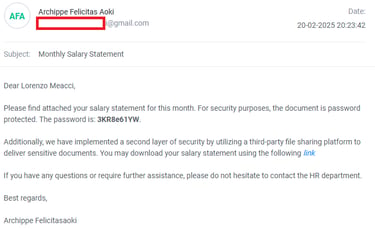
Next, we upload the file to a file-sharing platform and send the email
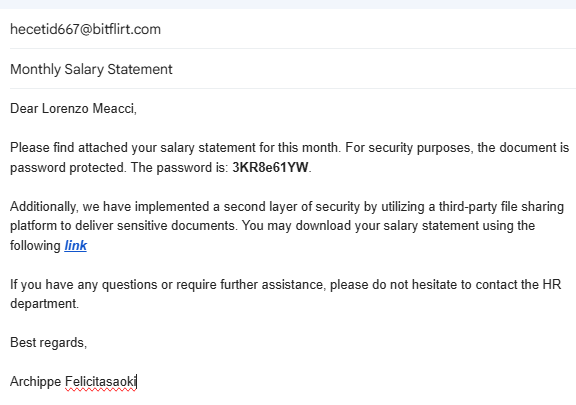

this is what the victim would receive:
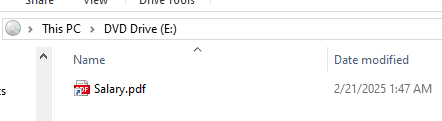
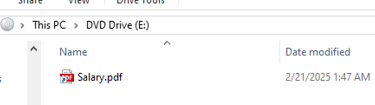
they would then download the file:


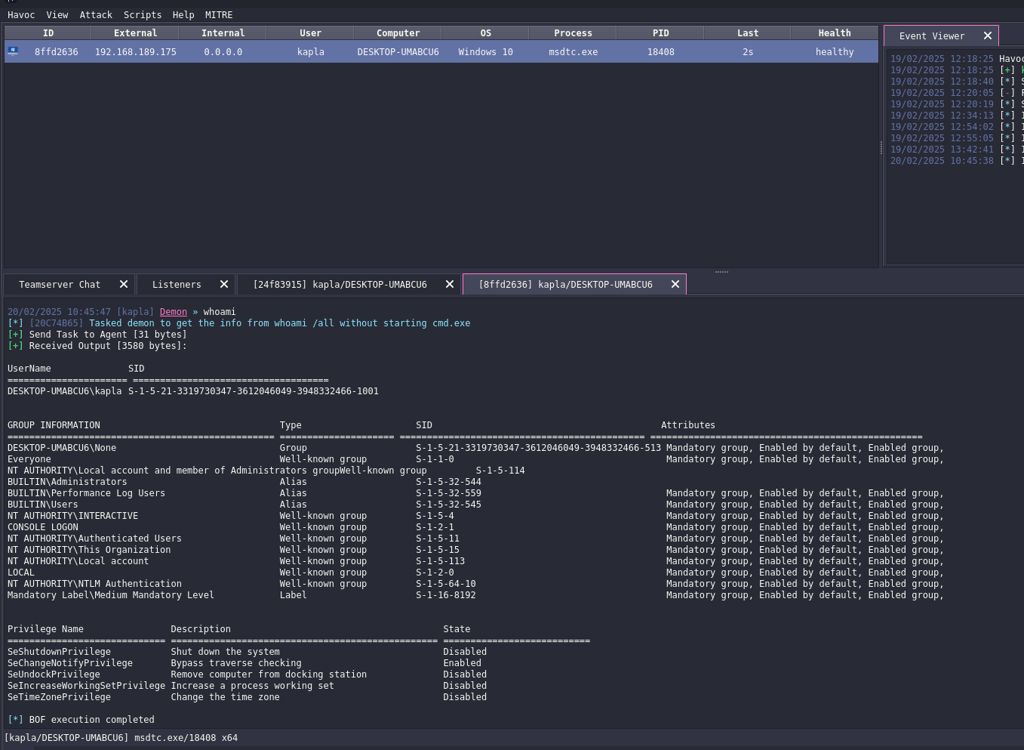
Once the user extracts the file and mounts it, they will see the PDF shortcut. After double-clicking it, the batch file will execute msdtc.exe, which will then download and load the Havoc demon.

BashBunny
During a physical engagement, we might gain access to an unlocked machine, making it an easy target for a Bash Bunny or Rubber Ducky attack.
The Bash Bunny is a compact USB device that emulates a keyboard, allowing it to execute keystrokes at super-fast speeds—compromising a machine within seconds. To learn more about the Bash bunny and related Hak5 tools, read this
When a Bash Bunny is plugged in attack mode, it acts as both a USB storage device and a keyboard, allowing us to host malicious files directly on it. To do this, create a new folder named "tools" in the root directory and add a payload.exe file inside it. The next step is to dynamically determine the Bash Bunny’s assigned drive letter, as it may vary depending on existing external or internal disks. In PowerShell, we can use the following code:
The BashBunny utilizes the Ducky script language to execute operations, it is really simple to understand, the basic operations are the following:
GUI r is used to start the Run GUI, the equivalent of pressing win + R.
DELAY is used to set delays between commands.
STRING what is found in here will be typed
A possible payload would be the following, the command finds the Bash Bunny's drive letter, copies payload.exe to C:\Windows\Tasks\chrome-startup.exe, and then executes it while staying hidden:
Note that the payload will become a child process of PowerShell, meaning that once the PowerShell window closes, the payload will terminate as well. I suggest using a remote process injection technique to prevent the beacon from dying.
Additionally, I recommend implementing a persistence technique. For guidance, refer to the Havoc blog or The NetExec blog
Additional resources
If you want to explore more initial access techniques, I highly encourage you to take the ZeroPoint Security Initial access and persistence course and for the coding segments Maldev Accademy.